Ever wanted to make your own video game? It might sound tricky, but with Scratch, it’s totally doable. Scratch is a cool tool that lets you build games using simple blocks of code. It’s a great way to get started with making your own scratching game. We’ll walk through how to get your game idea from your head into the computer.
Key Takeaways
- Get to know the Scratch interface to find your way around.
- Plan out your scratching game idea, including characters and how it will play.
- Use sprites and code blocks to build your game’s logic and add sounds.
- Add scoring and challenges to make your game more interesting.
- Test your scratching game and share it with others.
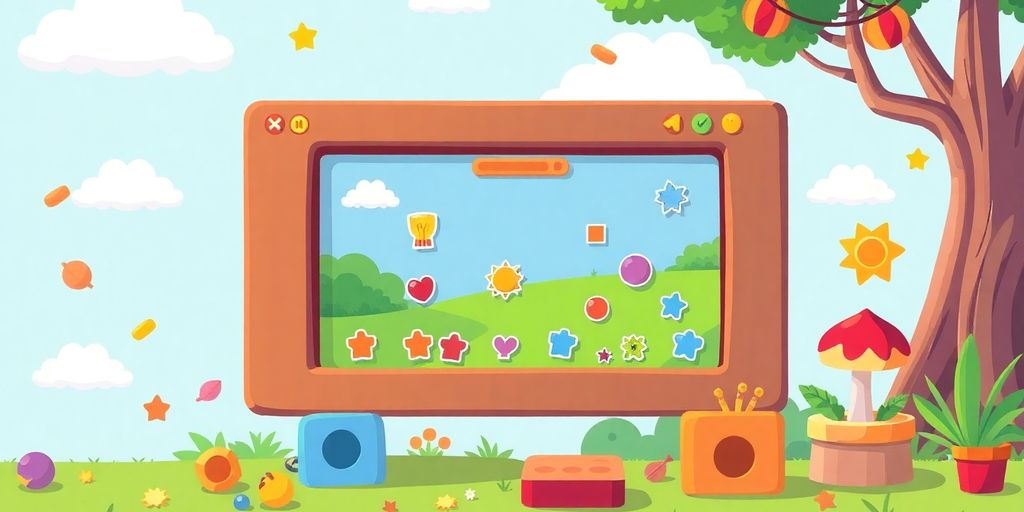
Understanding the Scratch Environment
Welcome to the world of Scratch, a fantastic platform for bringing your game ideas to life! Think of Scratch like a digital LEGO set for coding. Instead of bricks, you’re using colorful blocks that snap together to tell your computer what to do. It’s designed to be super accessible, meaning you don’t need to be a computer whiz to start creating. In fact, it was developed at the MIT Media Lab with the goal of making programming fun and easy for everyone, especially kids. It’s used all over the world, in tons of languages, and it’s a great way to learn how computers think.
The Scratch Interface Overview
When you first open Scratch, you’ll see a few main areas that work together. It might seem like a lot at first, but each part has a specific job. The whole setup is designed to be visual and intuitive, so you can focus on your game’s logic rather than complex syntax. It’s like having a visual blueprint for your project.
Key Components for Game Creation
To build your game, you’ll be working with several core elements within the Scratch environment:
- Stage: This is the main area where all the action happens. It’s like the theater stage where your characters perform. You can think of it using a coordinate system, with the center being (0,0). Everything you see in your game – characters moving, animations playing – appears here.
- Sprites: These are your characters or objects that you can control. Scratch usually starts you off with a cat sprite, but you can choose from a huge library or even draw your own. Each sprite can have its own scripts (code) that tell it what to do.
- Blocks Palette: This is where all the coding commands live. They look like puzzle pieces and are grouped by category (Motion, Looks, Sound, Events, Control, etc.). You drag these blocks and snap them together to create scripts for your sprites.
- Scripts Area: This is the blank canvas where you assemble your code blocks. You drag blocks from the palette and connect them here to build the instructions for your sprites. A script is essentially a sequence of these connected blocks.
The beauty of Scratch lies in its block-based system. It removes the frustration of typing errors and allows you to focus on the creative process of designing game mechanics and storytelling. You’re essentially building logic visually.
Conceptualizing Your Scratching Game
Before you even start clicking around in Scratch, it’s a good idea to have a plan. Think of this as the blueprint for your game. Without a solid concept, you might end up with a jumble of code that doesn’t really go anywhere. So, let’s break down how to get your ideas down on paper, or at least in your head.
Defining Your Game’s Core Idea
What kind of game do you want to make? This is the big question. Are you thinking of a fast-paced action game, a puzzle game, or maybe something more story-driven? It helps to have a central theme or goal. For example, you could aim for a game where you have to dodge falling objects, or perhaps a simple adventure where a character explores a new world. Having a clear objective makes the rest of the design process much smoother.
Character and Environment Design
Once you have a basic idea, think about who or what will be in your game. These are called sprites in Scratch. Will your main character be a cat, a robot, or something you invent yourself? What will they look like? Then, consider the world they inhabit. This is your backdrop. Will it be a colorful playground, a spooky cave, or outer space? The look and feel of your characters and environments really bring your game to life.
Planning Gameplay Mechanics
This is where you figure out how the game actually works. What does the player do? How do they interact with the game world? For instance, if you’re making a jumping game, you’ll need to decide how the jump works – maybe pressing the spacebar makes the character jump. You’ll also want to think about challenges. Will there be obstacles to avoid? How will the player score points? Planning these details now can save a lot of headaches later. It’s like mapping out the rules before you start playing.
What do you want the backdrop to be?
Do you want to add obstacles or multiple platforms?
Do you want to add a scoring system?
Here’s a quick way to jot down your initial thoughts:
| Game Element | Initial Idea |
|---|---|
| Core Concept | Dodge falling objects |
| Main Character | A small, bouncing blob |
| Environment | A simple, colorful sky |
| Player Action | Move left/right to avoid objects |
| Scoring | Points for each object dodged |
| Win/Lose Condition | Lose if hit by an object, no win condition |
Thinking through these points helps you create a solid foundation for your project. It’s all about turning that initial spark of an idea into something concrete that you can start building in Scratch. You can even book a free scratch coding class to get some hands-on experience with these concepts.
Building Your Scratching Game: The Production Phase
Now that you have a solid idea and a plan, it’s time to actually build your game in Scratch. This is where all your planning starts to come to life. You’ll be spending most of your time in the Scratch editor, piecing everything together.
Selecting Sprites and Backdrops
First things first, you need to pick the visual elements for your game. Sprites are the characters or objects that move around and interact in your game. Think of them as your actors. Scratch has a built-in library with tons of sprites to choose from, or you can even upload your own. You’ll also need a backdrop, which is the background of your game scene. Like sprites, Scratch offers a variety of backdrops, from simple colors to detailed scenes. Choosing sprites and backdrops that fit your game’s theme is important for making it look good.
Implementing Game Logic with Code Blocks
This is the heart of game creation in Scratch. You’ll use Scratch’s visual programming language, which consists of colorful code blocks, to tell your sprites what to do. You’ll drag and drop these blocks to create scripts that define movement, actions, and interactions. For example, you might use a "when green flag clicked" block to start your game, a "move 10 steps" block for movement, and "if touching edge, bounce" to keep your sprites on screen. Combining these blocks in the right order is how you create the gameplay.
Adding Sound Effects and Visual Flair
To make your game more engaging, you’ll want to add sound effects and visual touches. Scratch allows you to add sounds to your sprites and backdrops. You can choose from Scratch’s sound library or record your own. Sound effects can indicate actions, like a "boing" when a character jumps or a "clink" when a player scores. Visual flair can include things like changing a sprite’s costume when it moves, adding particle effects, or making elements flash. These details really bring your game to life and make it more fun to play.
Enhancing Gameplay and Progression
Now that you have the basic structure of your game in place, it’s time to make it more interesting and keep players coming back for more. This involves adding elements that track progress and introduce new challenges as the game goes on.
Developing Scoring and Level Systems
A score is a simple way to give players a goal. You can create a variable in Scratch to keep track of the player’s score. For instance, if your game involves collecting items, you can increase the score each time an item is collected. To make things more exciting, you can tie levels to the score. Once a player reaches a certain score, they can advance to the next level, which might introduce new obstacles or faster gameplay.
Here’s a basic idea for a scoring system:
| Action | Score Change |
|---|---|
| Collect an item | +10 |
| Complete a level | +50 |
| Lose a life | -5 |
Introducing Obstacles and Challenges
To keep your game from becoming too predictable, introduce new obstacles or change how existing ones behave. This could mean making obstacles move faster, appear more frequently, or even introduce entirely new types of obstacles that require different player strategies. For example, in a jumping game, you might introduce obstacles that require a double jump or a slide.
Consider these ways to add challenge:
- Speed Increase: Make the game faster as the player progresses.
- New Obstacle Types: Introduce elements that require different player actions.
- Limited Lives: Give players a set number of attempts before the game ends.
- Environmental Changes: Alter the background or add visual effects that might affect gameplay.
Creating Interactive Elements
Interactive elements go beyond just obstacles and scoring. Think about power-ups that temporarily boost the player’s abilities, like a speed boost or a shield. You could also add bonus items that give extra points or special effects. These elements add a layer of strategy and reward for skillful play, making the game more engaging and replayable.
Testing and Refining Your Creation
Once you’ve put your game together, it’s time to make sure it actually works the way you want it to. This is where testing and refining come in. It’s not just about fixing bugs, though that’s a big part of it. It’s also about making the game fun and smooth for anyone who plays it.
Debugging Common Issues
Bugs are those little glitches that can stop your game in its tracks. Maybe a character doesn’t move when you press a key, or the score doesn’t update correctly. You’ll need to go back into your code blocks and figure out why these things are happening. Often, it’s a small mistake, like a block being in the wrong place or a condition not being met. Keep a list of problems you find. This helps you track what needs fixing.
Gathering Feedback from Playtesters
Your friends or family can be a great help here. Let them play your game and watch what they do. Ask them specific questions: Was anything confusing? Was it too hard or too easy? Did they find any parts boring? Don’t just listen to what they say, watch how they play. Sometimes people will say something works fine, but their actions show it doesn’t. This feedback is gold for making your game better.
Iterative Improvement for Optimal Play
Based on your testing and the feedback you get, you’ll make changes. This is the iterative part – you test, you change, you test again. Maybe you need to adjust how fast a character moves, change the timing of an event, or add more instructions. It’s a cycle of making things better. Think about how you might build your own blockchain – it also involves a lot of testing and refinement to get it right. Keep tweaking until the game feels just right.
Sharing Your Scratching Game
Preparing Your Project for Launch
Once you’ve put in all the work to build and test your game, it’s time to get it ready for others to play. This means doing a final check of everything. Make sure all the code blocks are organized and that your sprites and backdrops look just right. Think about adding a simple instruction screen or a welcome message so players know how to start. It’s also a good idea to give your game a clear title and maybe a short description that tells people what it’s about. This helps players understand your game before they even start.
Publishing on the Scratch Platform
Sharing your game with the world is exciting! The Scratch platform makes it pretty straightforward. After you’ve finished your game and are happy with it, you can click the "Share" button right in the editor. This makes your project public. You can then add more details, like specific instructions for playing, tips, or even a story behind your game. People can then find your game on the Scratch website, play it, and even remix it if they want to build upon your idea. It’s a great way to see what others think and to connect with other Scratch creators. You might even see your game become popular on Reddit!
Here’s a quick checklist before you hit share:
- Final Playtest: Play through your game one last time to catch any small issues.
- Instructions: Add clear instructions on how to play.
- Description: Write a brief, engaging description of your game.
- Thumbnail: Consider creating a custom thumbnail image to make your game stand out.
Getting your game out there is a big step. It’s a chance for others to enjoy what you’ve created and for you to get feedback that can help you grow as a game maker.
Putting It All Together
So, you’ve learned the basics of creating your own game using Scratch. From planning your idea to coding the interactions and finally sharing your creation, the process is quite rewarding. Remember, Scratch is a tool that lets you bring your imagination to life. Don’t be afraid to experiment with different sprites, sounds, and code blocks. Every game you make is a chance to learn something new and improve your skills. Keep building, keep playing, and most importantly, keep having fun with your creative projects.
Frequently Asked Questions
What exactly is Scratch?
Scratch is a free online tool that lets you create your own stories, games, and animations. It uses colorful blocks that you snap together like LEGOs to tell characters what to do. It’s a super fun way to learn how computers
What are sprites and backdrops in Scratch?
Think of sprites as your game’s characters or objects, like a player, an enemy, or a collectible item. Backdrops are the scenes or backgrounds where your game takes place, like a forest, a city, or outer space. You can choose from Scratch’s library or even upload your own!
How can I make my Scratch game more lively?
You can make your game more exciting by adding sounds for actions like jumping or collecting items, and visual effects like flashing or changing colors when something happens. This makes your game more engaging for players.
How do I add challenges and scoring to my game?
To make your game challenging, you can add obstacles that players need to avoid, or create different levels that get harder as you progress. A scoring system keeps track of how well players are doing, which can make them want to play again to beat their own high score.
Why is planning important before I start coding my game?
Before you start building, it’s a good idea to sketch out your game’s main idea, characters, and how it will play. This plan helps you stay organized and makes the building process smoother. It’s like having a map before you start a journey!
What should I do after I finish making my game?
After you’ve built your game, it’s important to test it thoroughly to find and fix any mistakes, or ‘bugs.’ Asking friends to play your game can help you find problems you might have missed. Then, you can make improvements based on their feedback to make your game even better before sharing it.